

BEFORE INSTALLATION - Please check that your strip is fully suitable for your needs before installing. Make sure that you are happy with the colour & effects (if applicable) and that it powers on, as we cannot accept returns on items that have been cut to length, damaged during installation, or are returned in a state other than that in which they were supplied to you. The last thing you want is to fully install an LED strip and only then find out there is a problem somewhere, necessitating a full removal. Take care when installing. Although we only supply high-quality tapes, the IP20 ones can be more delicate than ones with a higher IP rating due to the fact that they have no silicone protection. We accept no responsibility for accidental damage caused by you during the installation process. If you are using your own adapter rather than purchasing one from us, please ensure that it is suitable for the voltage of the strip that you are using. A lower voltage supply may result in dim lights (or no light at all), whereas a higher voltage supply may burn the lights out.
Measure up your space carefully and ensure that you’ve ordered everything you need. We can offer recommendations about which items will be most suitable for your needs, but we can’t offer specific advice about your particular installation. If in doubt, consult a professional lighting installation expert before starting work.
Once you have received your items, it’s advisable to check that they work in situ and that there are no potential problems to overcome. If you’ve chained more than one together, do they need additional power? Are there any obstructions to work around? Is there any interference from nearby devices? Do they meet your expectations in terms of the colour and light cast now that it is in its intended location? Do you need to change anything about your setup? Is it bright enough for your needs, or do you need an alternative?
IP20 and IP65 strips usually come supplied with an adhesive backing tape. Although you can use this to attach your strip to the surface of your choice, we don’t generally recommend it if you intend to keep the strip attached permanently.
The stickiness, just like any tape, will depend on the location and material you choose to use it on. Metals, glass and plastics will have different adhesion properties than rougher, more porous surfaces, such as wood and plaster, for example.
IP67 and IP68 led strips are not self-adhesive. These are enclosed in silicone tubes and are meant to be used in excessively wet or (in the case of IP68) in underwater areas where the adhesive would fail. It is recommended these are fixed either with LED strip clamps or a waterproof sealant such as bathroom silicone.
INSTALLATION GUIDE
IF YOU ARE LOOKING FOR GENERAL ADVICE FOR BUYING LEDS, CLICK HERE. IF ALL ELSE FAILS AND YOU STILL CANNOT FIND THE ANSWERS YOU ARE LOOKING FOR, YOU CAN GET IN TOUCH VIA OUR CONTACT US PAGE.
Step 1
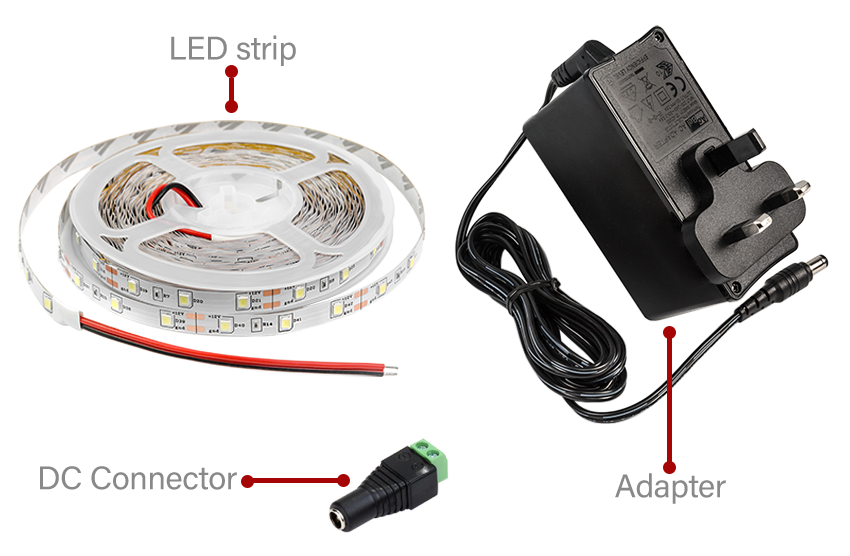
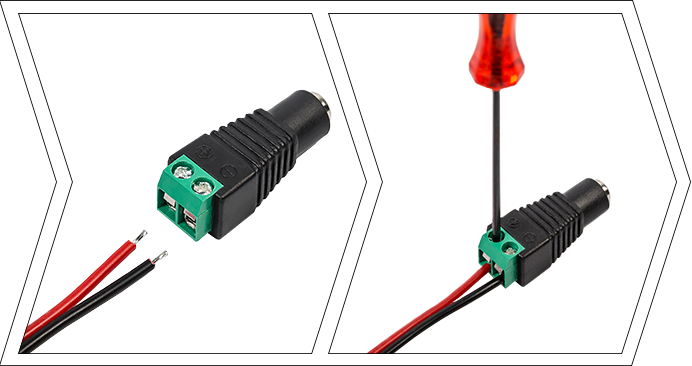
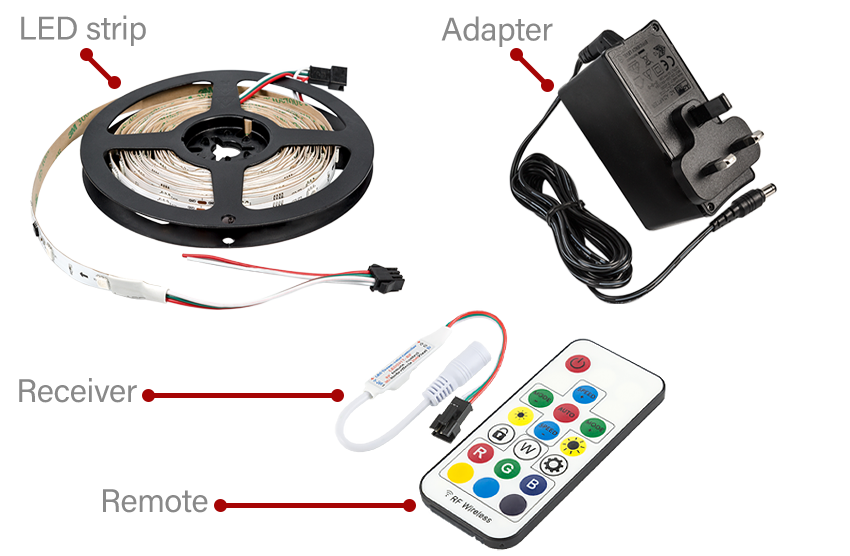
Separate the wires by a centimetre or two and make sure there is enough exposed wire to make a connection. If not, carefully trim the cable back, but don't expose more than you need. Line the red wire up with the positive (+) and the black wire up with the negative (-) terminals on the DC connector. If you get them the wrong way round the strip will not light up. Insert the wires and, using a philips head screwdriver, tighten the screws. Don't overtighten them as this may damage the wire.
Step 2
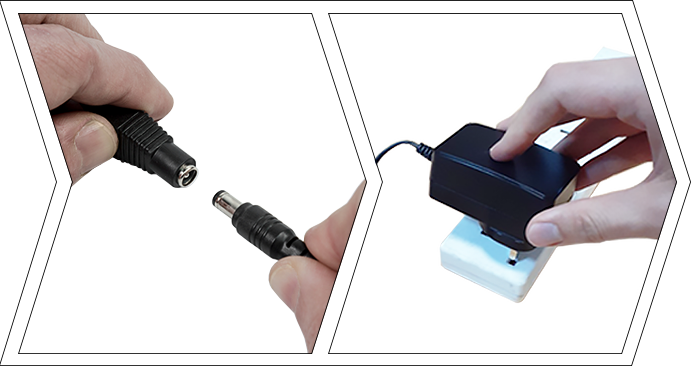
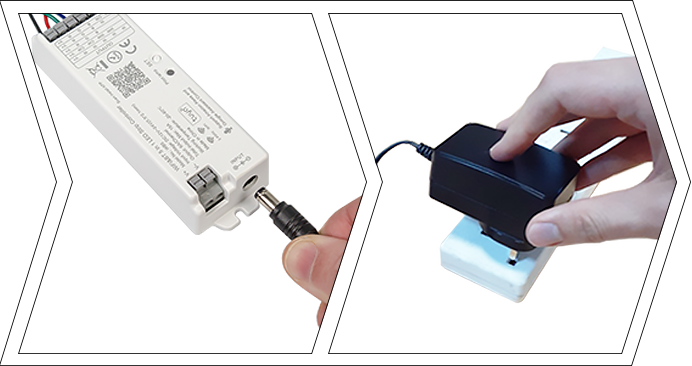
Join the DC connector with the power adapter and plug the power adapter into the mains electricity supply.
Step 3
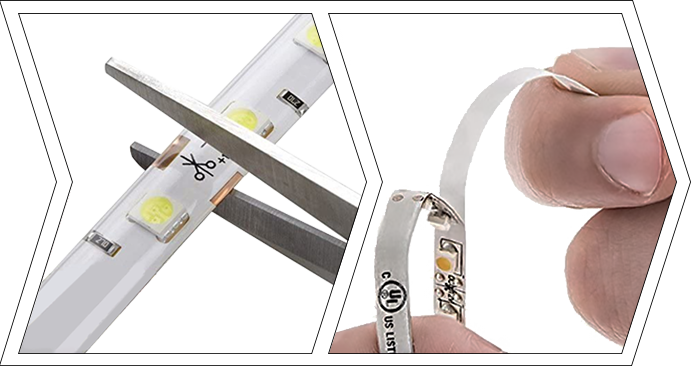
You can cut the LED strip to the required size and stick it in place after you remove the protective plastic from the adhesive back surface (on IP20 and IP65 strips). Make sure you disconnect the power supply first! IP67 and IP68 strips can still be trimmed to length, however the cut end must be resealed with silicone in order to preserve the level of ingress protection. Not all strips have a 'cut' (scissors) icon printed on them, in which case you can cut directly through the centre of the copper terminals. There is usually a straight line printed there for this purpose.
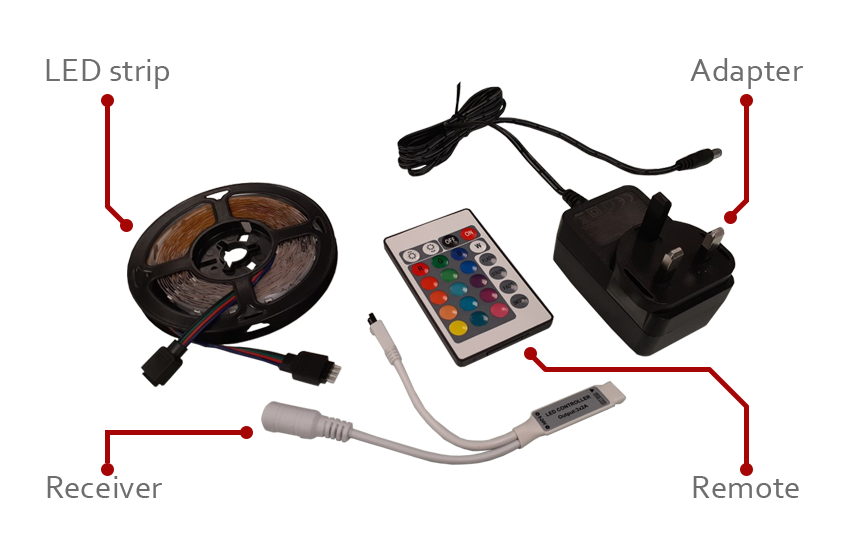
Step 1
Ensure the pin connector is fitted into either one of the LED strip endpoints.
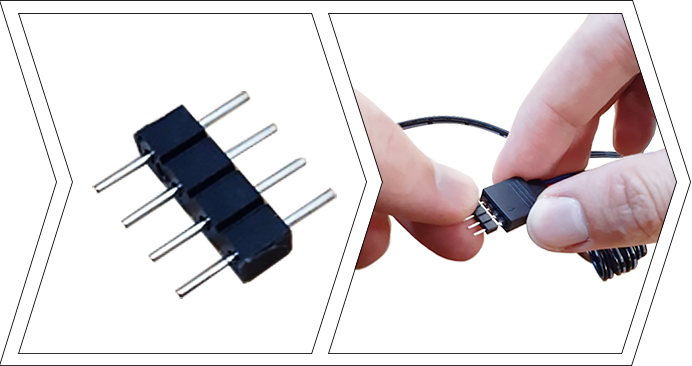
Step 2
Use the pin connector to connect the LED strip to the receiver. There is an arrow on each component. Make sure that they are opposite and facing each other, otherwise the strip will not light up. The pin connector does not need to be any particular way round.

Step 3
Plug the power adapter into the mains electricity supply. Connect the power adapter to the LED controller component.

Step 4
You can cut the LED strip to the required size and stick it in place after you remove the protective plastic from the adhesive back surface (on IP20 and IP65 strips). Make sure you disconnect the power supply first! IP67 and IP68 strips can still be trimmed to length, however the cut end must be resealed with silicone in order to preserve the level of ingress protection. Not all strips have a 'cut' (scissors) icon printed on them, in which case you can cut directly through the centre of the copper terminals. There is usually a straight line printed there for this purpose.
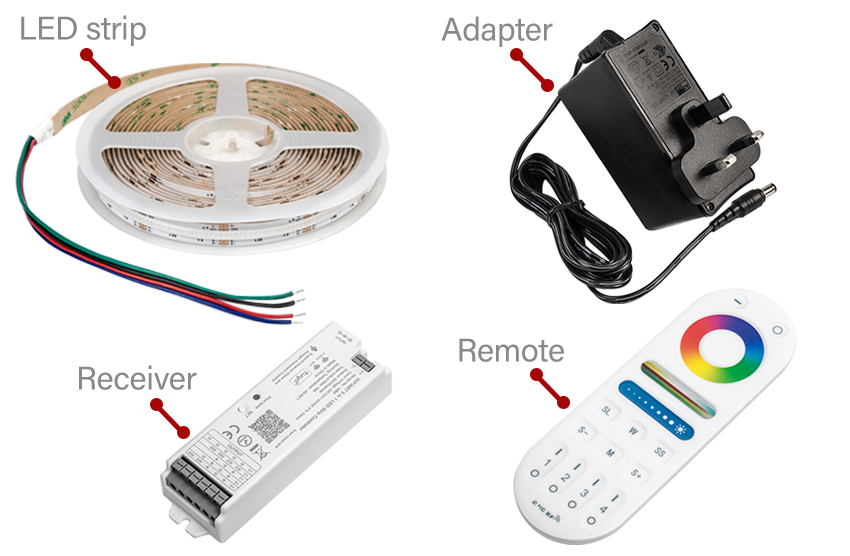
Step 1
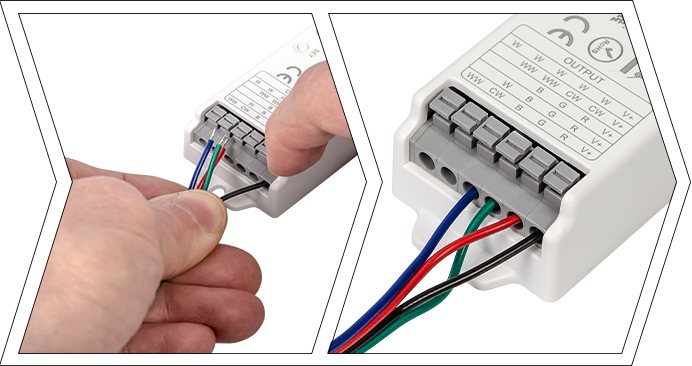
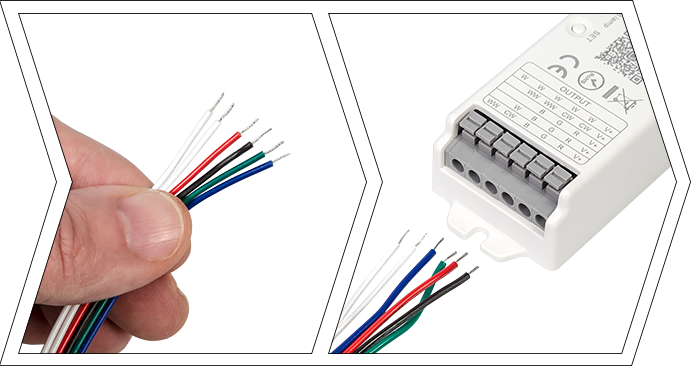
Separate the wires by a centimetre or two and make sure there is enough exposed wire to make a connection. If not, carefully trim the cable back, but don't expose more than you need. Line the wires up with the correct terminal on the receiver. They are colour-coded on top (R = RED, G = GREEN etc).
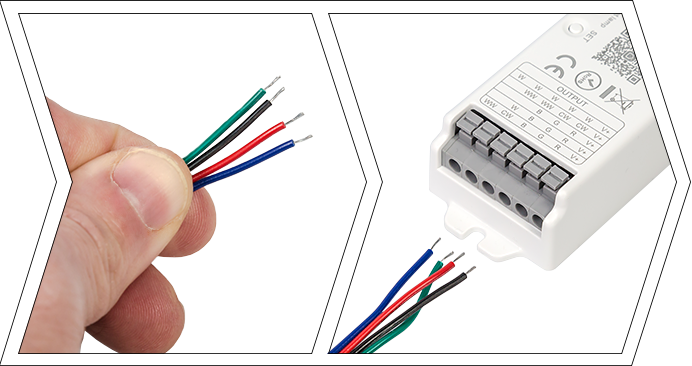
Step 2
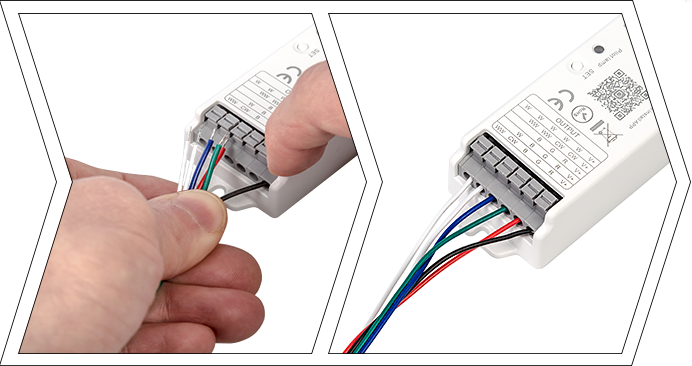
Gently press the top of each terminal as you insert the wires to open the connection. When you release the terminal it will grip the wire and remain in place. They should be connected as per the image below. Note that the black wire connects to the V+ terminal.
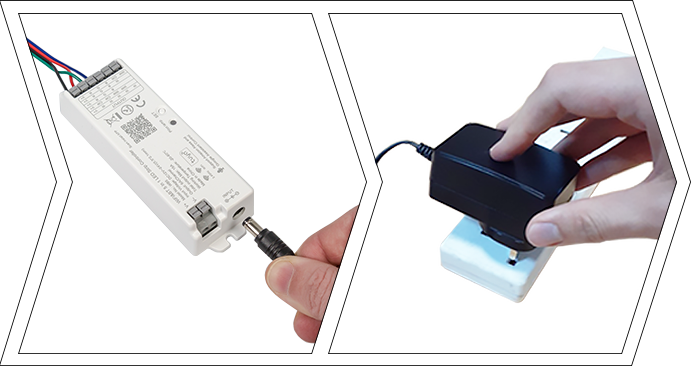
Step 3
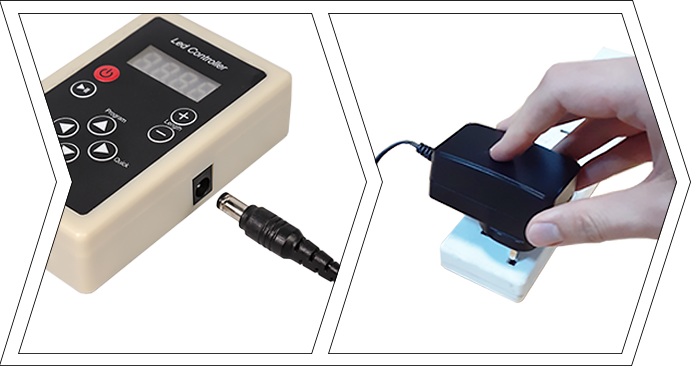
Connect the receiver to the power adapter, then connect the power adapter to the mains power supply.
Step 4
The pilot lamp on the receiver will light up. Press the 'SET' button on the receiver to cycle through available output modes. Refer to the receiver manual for more information on what each mode does.

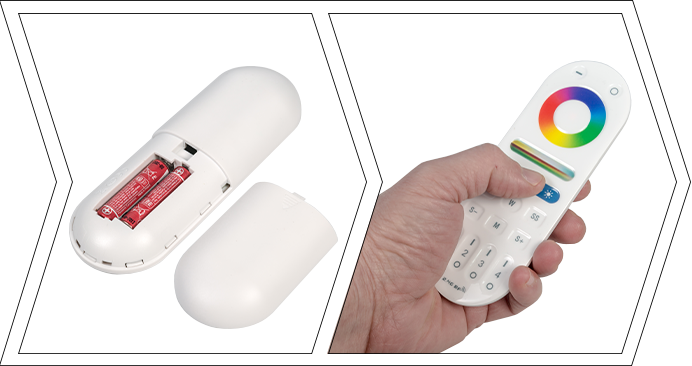
Step 5
Insert the batteries into the remote controller. You will now have full control of the lighting modes available for your LED strip.
Step 6
You can cut the LED strip to the required size and stick it in place after you remove the protective plastic from the adhesive back surface (on IP20 and IP65 strips). Make sure you disconnect the power supply first! IP67 and IP68 strips can still be trimmed to length, however the cut end must be resealed with silicone in order to preserve the level of ingress protection. Not all strips have a 'cut' (scissors) icon printed on them, in which case you can cut directly through the centre of the copper terminals. There is usually a straight line printed there for this purpose.
Step 1
Separate the wires by a centimetre or two and make sure there is enough exposed wire to make a connection. If not, carefully trim the cable back, but don't expose more than you need. Line the wires up with the correct terminal on the receiver. They are colour-coded on top (R = RED, G = GREEN etc).
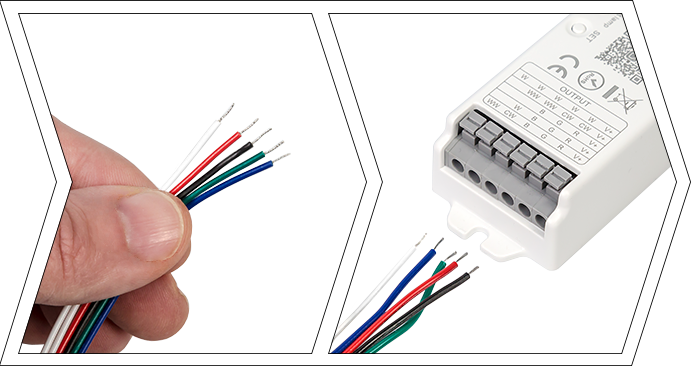
Step 2
Gently press the top of each terminal as you insert the wires to open the connection. When you release the terminal it will grip the wire and remain in place. They should be connected as per the image below. Note that the black wire connects to the V+ terminal.

Step 3
Connect the receiver to the power adapter, then connect the power adapter to the mains power supply.
Step 4
The pilot lamp on the receiver will light up. Press the 'SET' button on the receiver to cycle through available output modes. Refer to the receiver manual for more information on what each mode does.
Step 5
Insert the batteries into the remote controller. You will now have full control of the lighting modes available for your LED strip.
Step 6
You can cut the LED strip to the required size and stick it in place after you remove the protective plastic from the adhesive back surface (on IP20 and IP65 strips). Make sure you disconnect the power supply first! IP67 and IP68 strips can still be trimmed to length, however the cut end must be resealed with silicone in order to preserve the level of ingress protection. Not all strips have a 'cut' (scissors) icon printed on them, in which case you can cut directly through the centre of the copper terminals. There is usually a straight line printed there for this purpose.
Step 1
Separate the wires by a centimetre or two and make sure there is enough exposed wire to make a connection. If not, carefully trim the cable back, but don't expose more than you need. Line the wires up with the correct terminal on the receiver. They are colour-coded on top (R = RED, G = GREEN etc).
Step 2
Gently press the top of each terminal as you insert the wires to open the connection. When you release the terminal it will grip the wire and remain in place. They should be connected as per the image below. Note that the black wire connects to the V+ terminal.
Step 3
Connect the receiver to the power adapter, then connect the power adapter to the mains power supply.

Step 4
The pilot lamp on the receiver will light up. Press the 'SET' button on the receiver to cycle through available output modes. Refer to the receiver manual for more information on what each mode does.
Step 5
Insert the batteries into the remote controller. You will now have full control of the lighting modes available for your LED strip.
Step 6
You can cut the LED strip to the required size and stick it in place after you remove the protective plastic from the adhesive back surface (on IP20 and IP65 strips). Make sure you disconnect the power supply first! IP67 and IP68 strips can still be trimmed to length, however the cut end must be resealed with silicone in order to preserve the level of ingress protection. Not all strips have a 'cut' (scissors) icon printed on them, in which case you can cut directly through the centre of the copper terminals. There is usually a straight line printed there for this purpose.

Step 1
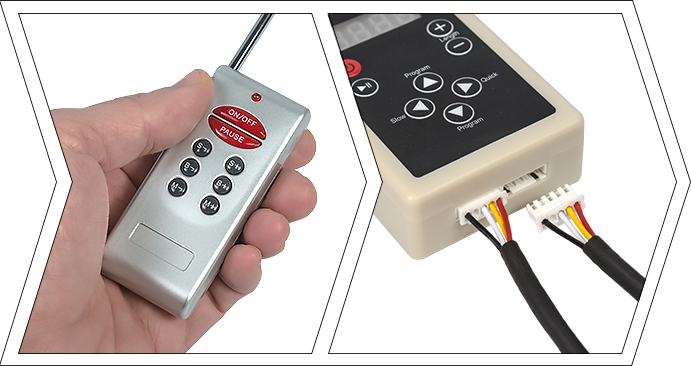
Connect the LED strip to one of the receiver cables as shown below. Connect the other end of the receiver cable to the receiver box.

Step 2
Plug the power adapter into the receiver and the adapter into the mains power supply. Switch the power on.
Step 3
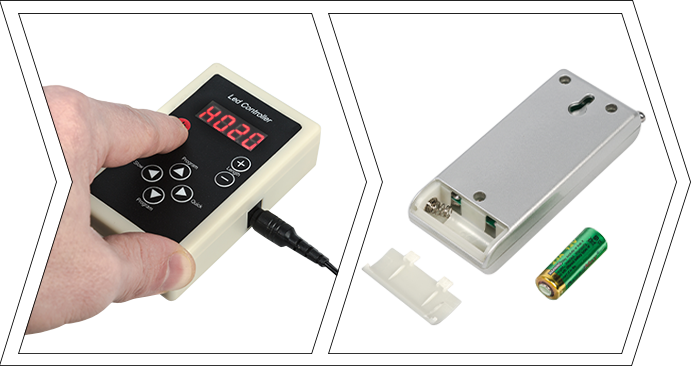
If the receiver doesn't switch on automatically, press the power button. Insert the battery into the remote control.
Step 4
Extend the antenna and switch on the remote control. You will now be able to control the light patterns of the LED strip. If you wish, you can power another strip by attaching the second receiver cable to the receiver box.
Step 5
You can cut the LED strip to the required size and stick it in place after you remove the protective plastic from the adhesive back surface (on IP20 and IP65 strips). Make sure you disconnect the power supply first! IP67 and IP68 strips can still be trimmed to length, however the cut end must be resealed with silicone in order to preserve the level of ingress protection. Not all strips have a 'cut' (scissors) icon printed on them, in which case you can cut directly through the centre of the copper terminals. There is usually a straight line printed there for this purpose.
Step 1
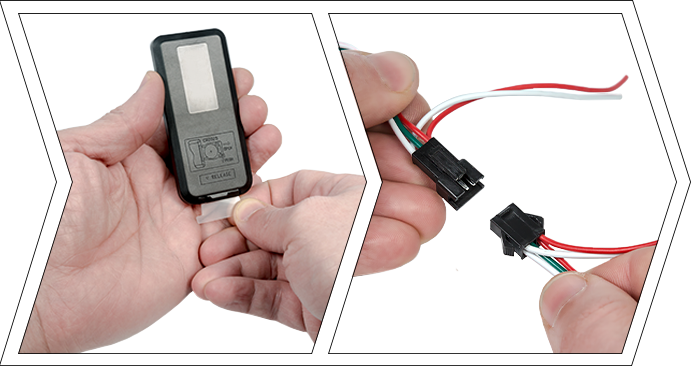
Clip the 'male' connector of the cable into the 'female' connector of the receiver. Ensure the clip is firmly latched.

Step 2
Connect the power adapter to the receiver. Plug the adapter in to the mains supply and switch it on.

Step 3
If your remote controller has a plastic tab under the battery, remove it. You can now use the remote to control your LED strip. You can also chain strips together by latching the female connector at the other end of the strip to the male connector of a second strip.
Step 4
You can cut the LED strip to the required size and stick it in place after you remove the protective plastic from the adhesive back surface (on IP20 and IP65 strips). Make sure you disconnect the power supply first! IP67 and IP68 strips can still be trimmed to length, however the cut end must be resealed with silicone in order to preserve the level of ingress protection. Not all strips have a 'cut' (scissors) icon printed on them, in which case you can cut directly through the centre of the copper terminals. There is usually a straight line printed there for this purpose.


